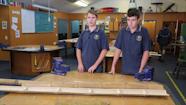
Hands-on experiences allow the students to see materials understandings in action.
Linking hands-on experiences and understandings
Transcript
Terry Mitchell: Well at year 9 I like the approach as in we give the students materials and they can look at the materials, touch them and explore the properties of the materials. Without having to do a lot of theory work, they’ve got it in their hands, they can see what they are working with and see how they feel. Then they get to experiment with cutting and shaping and drilling and what they can do with those materials. For example our simple project at Year 9, making a Sheppard’s Whistle.
Student 1: Yeah when we first turned up at the start of the year the first project we started working on after the testing that we did was we started making some aluminium whistles, so that we could learn the properties of aluminium and how it’s bendy and how you can easily drill holes in it and manipulate it to be how you want it.
Student 2: We did the water bucket test. So we put it in and we judged it towards all the other materials that we had placed in the bucket.
Steve Andrew: Come and stand around here so you can see guys.
Student 2: Yeah it’s rusty, so...
Steve: So give us a mark, what do you reckon? 10 being good, 1 being no good.
Student 2: I think it’s a one and a half, zero.
Terry: And then they get to make the same whistle out of an acrylic, and they realise that although they are making the same product they have to use totally different techniques.
Student 2: We’ve made the two whistles out of the two different materials because well this one was just our first project and this one it’s a smoother feel in your mouth and it’s quite, and it feels comfortable in your mouth, as in this one it’s kind of cold and it kind of tastes metallic-y. And with this one it’s probably more cost effective because just of the material.
Steve: And what’s your slant on this one, what do you think that you’ve learnt out of this?
Student 1: So what we’ve done is we’ve learnt that the same thing can be made out of two materials, and that using a different material can sometimes improve a product that you’ve made. Like with the first one we made, we made the whistle and it worked, but if you got scratches in it, it will be harder to clean out properly, and it’s sometimes quite cold. Whereas with this one it is easy to clean, comfortable in your mouth and, yeah, works well as well.
Terry: What I enjoy about teaching technology this way is it’s teaching students to think that everything they do they have to have in their own minds clearly why they are doing it. And I think that’s the key is that they are always thinking why am I doing it this way, why am I using these materials to make this product. They, I think we’re teaching them to be problem solvers.
Student 1: The only thing with doing different materials though is you have to know the materials properties. Like with the aluminium all we needed to do was use the bender and just bend it, but with the Perspex we had to make sure that it was hot, so it was kind of melted and easy to bend.
Student 2: And as we drilled it before it was quite easy and smooth to drill the aluminium whistle, but with the Perspex whistle it was quite tough to drill, and also as Ryan says it’s quite hard to bend.
Terry: The kids really learn that these properties are core to what you have to know when you are making things.
Related videos
Combining knowledge and practice (01:58)
Steve Andrew explains how understanding materials is essential for effective technological practice.
Play, experiment, explore (02:55)
Steve Andrew lets the students see, feel, and play with products to develop their understandings in materials.
Finding materials to meet the specs (02:36)
Steve Andrew shares how students identify material specifications in a brief and then test materials to find those that are suitable....
School–industry relationship cuts both ways (03:36)
Steve Andrew and Terry Rillstone describe the way the relationship between St John's College and The Shop has benefits for them both....
Pushing the boundaries with materials (02:53)
Steve Andrew describes how his senior students have the confidence to select and work with unfamiliar materials.
Exploring unfamiliar materials (02:44)
Year 12 students from St John's College describe what they know about bamboo and how they are applying this knowledge to their projects....
Students and teachers talk about testing materials in year 11.
Manipulating, forming, and transforming
Students in year 10 describe manipulating, forming, and transforming materials.
Evaluating materials for an outcome
Steve Andrew and students talk about using their knowledge to test materials for their projects at year 12.
Year 10 students describe some of the attributes for the snake skates they are developing.
Senior students select their own issues
Year 12 students talk about the issues that they have selected for their projects.


